
Table of Contents
Introduction
I received a request from one of my viewers who has created a product, a Wifi Stepper motor controller that he is promoting using crowdfunding. After viewing the crowdfunding page I readily agreed to test and review it. The following article and its accompanying video are the results of my evaluation.
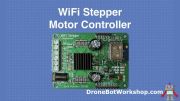
WiFi Stepper
The Wifi Stepper was developed by Andrew Klofas of Good Robotics. It is currently being crowdfunded on the Crowd Supply fundraising platform.

The Wifi Stepper has several impressive features:
- Supports bipolar stepper motors rated at up to 85 volts at 10 amperes.
- Complete wireless control over WiFi.
- Has a full-featured web-based user interface.
- Has a JSON API to allow control using a script on a remote computer.
- Several security features to secure your installation.
- Supports Current and Voltage control.
- Allows a stepper motor to emulate a servo motor.
- Can use an external step clock source.
- Supports an external stop and reverse switch.
- UART Serial Port.
- I2C Bus connection.
- 10-bit Analog to Digital Converter input.
This module is perfect for IoT, robotics, home automation, and other projects where running control connections to the stepper motor controller would be impractical. The web-based interface simplifies both controlling the stepper motor and writing Bash and Python scripts.

Internal Components
The WiFi Stepper consists of four key components:
- ESP8266 WiFi controller.
- powerSTEP01 stepper motor driver.
- Microchip ATECC508A crypto-authentication module.
- Maxim MAX15062 high-efficiency voltage regulator.
Let’s examine these components in more detail.
ESP8266 WiFi Controller
For many of you, the ESP8266 requires no introduction. This chip has been a popular component in many DIY electronics projects and is featured in many commercial designs as well.
Manufactured by Espressif Systems, the ESP8266 combines a WiFi interface with a microcontroller. It’s low-cost and ability to be programmed using the popular Arduino IDE has made it a favorite component with makers and hackers.
The WiFi Stepper uses the small form-factor ESP-WROOM-02 package of the ESP8266 in its design. The board brings out several of the ESP8266 connections to a male header, allowing experimenters to make further use of the capabilities of the WiFi chip.
powerSTEP01 Stepper Motor Driver
The powerSTEP01 is a stepper motor driver chip that uses 8 N-channel power MOSFETs to allow it to drive motor coils at up to 85 volts at 10 amperes. It features overcurrent and overtemperature and motor stall protection.
On the WiFi Stepper, this chip has been provided with a heatsink to keep it running cool.
The powerSTEP01 has its own integrated controller that provides full control of the stepper motors speed and position. It communicates using the SPI bus at 5Mbits.
The powerSTEP01 can provide stepping modes of up to 1/128 microstep.
Microchip ATECC508A Crypto-authentication Module
The Microchip ATECC508A crypto-authentication module supports the ECDH (Elliptic Curve Diffie–Hellman) key agreement, allowing it to provide authentication without the need for secure storage. This device is popular in industrial, home automation, medical, and IoT applications.
The ATECC508A can store up to 16 keys and communicates on the I2C bus.
Maxim MAX15062 High-efficiency Voltage Regulator
The Maxim MAX15062 is a High-Voltage Synchronous Buck Regulator in a very small package. It supplies the operating voltage for the logic circuitry on the WiFi Stepper.
This device is completely self-contained and operates with a very wide range of input voltages.
Connections
The components for the WiFi Stepper are mounted on a printed circuit board that measures 78mm x 57mm (3.07 x 2.25 inches). The board appears to be of very high quality.

The board sports the folowing connectors:
Terminal Strip
This 6-screw connector terminal strip has the following connections:
- GND – The Ground connection
- VIN – Positive DC voltage input, 85 volts maximum
- A- – Stepper Motor Coil A.
- A+ – Stepper Motor Coil A
- B+ – Stepper Motor Coil B
- B- – Stepper Motor Coil B
Power Jack
The WiFi Stepper has a 2.1mm barrel connector. This can be used to supply power at up to 50 volts DC.
powerSTEP01 Breakouts
There is a 6-pin male header at the top of the board that can be used to make direct connections to the powerSTEP01 stepper motor driver.
- 3V3 – A 3.3-Volt output for driving external logic circuitry
- GND – A Ground connection.
- SW – An input for an external switch. This accepts a 3.3-volt logic-level signal and has an internal pull-up resistor.
- STEP – An input for an external stepper clock signal. It is a 3.3-volt logic signal.
- FLAG – An active-low error signal. It is also connected to the internal red FLAG LED.
- BUSY – An active-low busy signal. It’s low when the stepper motor driver is executing a command.
ESP8266 Breakouts
The 9-pin male header at the bottom of the board provides connections to the ESP8266 WiFi controller module.
- 3V3 – A 3.3-volt power output for powering external logic circuitry.
- GND – A Ground connection.
- SCK – The I2C clock connection.
- SDA – Th eI2C Data connection.
- RST – The ESP8266 Reset pin. Sending this low will disable the ESP8266.
- ADC – The 10-bit analog to digital converter input.
- BOOT – The ESP8266 BOOT pin. Ground this to enter the ESP8266 bootloader.
- RX – The ESP8266 UART receive.
- TX – The ESP8266 UART transmit.

Status LEDs
The board also has three status LEDs.
- POWER – Indicates power on.
- FLAG – Indicates that an error flag has been raised.
- WIFI – A WiFi activity LED
In addition, the WiFi Stepper board has a Reset switch. Pressing and holding this button will reset the device to its initial factory configuration.
Solder Pads
On the bottom of the WiFi Stepper board there are two long pads.

These pads are across some low-value power resistors on the top of the board. The power resistors are used to measure the amount of current delivered to the motor coils when The WiFi Stepper is in Current Control Mode.
When the WiFi Stepper is used in Voltage Control Mode the resistors are not necessary and, as they are in series with the motor coils. They slightly reduce the amount of current delivered to the stepper motor.
If you only plan to run the unit in Voltage Control Mode then you can use these pads to solder a jumper or bridge and effectively short out the power resistors. This will slightly increase the available torque in Voltage Control Mode.
In my tests I did not bridge these pads as I wanted to experiment with both modes.
Getting Started
Now that we have gone over the components and connections on the WiFi Stepper controller board it’s time to hook it up!
Motor Connections
The first step is to connect a bipolar stepper motor to the controller. This is done using the terminal strip A and B connections.
If you are not sure about your stepper motors connections the best bet is to try and find a spec sheet that details them. But if that isn’t possible you can figure it out using a multimeter.
Measure the resistance across different combinations of the four wires from your stepper motor. Two pairs of wires should show a very low resistance, the other combinations should show infinite resistance.
The two wire pairs with the low resistance are the two motor coils. Connect them to the A and B connections on the terminal strip.
Of course, this method does not give you the coil polarity or phase, however, in the web-based user interface you can reverse the polarity of one of the coils. This eliminates the need to manually reverse the wires.
Power Supply
Next is the power supply. You will want to use a power supply with the same voltage rating as your stepper motor coils, and with enough current capacity as well. The faceplate on your motor may have all the details you need.
If your power supply is less than 50 volts you have two choices for connecting it.
You can use the 2.1mm barrel power connector with a mating plug, the center wire is the positive connection. Or you can use the remaining two terminals on the terminal strip, paying close attention to polarity.
If your power supply is between 50 and 85 volts then you’ll need to use the terminal strip connectors instead of the barrel connector.
WiFi Setup
Once you apply power to the WiFi Stepper controller it will power up the ESP8266 and start the wifi. The next step is to set up the wifi connection on the device you intend to use to control the stepper motor.
You can use a computer, tablet or phone to control the stepper motor, the web-based interface is responsive so it supports all three platforms.
On your device open your wifi connections and scan for a source with an SSID of wsx100-ap. This is the connection to the WiFi Stepper.
Initially, the wifi connection wsx100-ap is open, it has no passkey. So it should be very easy to connect to. Once you are in the web-based interface you may set up a passkey and change the SSID if you wish to.
After you have established a wifi connection to the board you can start using the web-based user interface to control your stepper motor.
Web-Based User Interface
The WiFi Stepper controller supports a full-featured web-based user interface that allows you to control virtually every aspect of your stepper motor operation.
Once you have connected to the WiFi Stepper controller via wifi you can access the user interface using your web browser.
Open your browser and type http://192.168.4.1 into the address bar. Alternatively, you may type http://wsx100.local.
This should launch the web-based user interface. Let’s look at some of the features of this interface.
Settings
The settings screen is the first page you will see when you open the web-based user interface.

The Settings screen allows you to set up and modify the WiFi connection parameters, essentially this is a control panel for the ESP8266 functions.
You can change the SSID and add a passkey and hide the SSID for added security.
You can set up the API to use https, again for added security. This is useful in applications where you will be controlling the WiFi stepper using a script on a remote computer.
You can also reset the device back to factory specifications.
Troubleshooting & Documentation
There are separate pages for Troubleshooting and Documentation for the hWiFi Stepper. As I have been testing with a pre-release version of the product it is likely that when you use the final release there will be changes here.

The Troubleshooting page has a number of troubleshooting tips, useful if you are experiencing difficulties in getting your setup to work properly.
The page lists a number of common issues, possible causes, and possible solutions. It covers a variety of issues that you might encounter.

The Documentation page contains, what else, documentation for the WiFi Stepper.
The version I have lists documentation for the correct hookup of your stepper motor, including hints for determining the wiring and specifications for your motor.
As with the Troubleshooting page, I suspect that the final version will have additional entries.
Quick Start
The Quick Start page is actually the page you will be using the most. This is the page that allows you to set up and control the stepper motor.

The page allows you to set up the mode you want to use the stepper motor in:
- Speed Control – In this mode, you can control the speed and direction of the motor
- Servo Control – This mode allows you to operate the motor somewhat like a servo motor. You can specify the position that you want to move the shaft to.
- External Step Clock – This mode lets you control the servo motor using an external clock source.
In addition, the Quick Start also lets you specify how you want to drive the stepper motor.
- Voltage Control – In this mode, the stepper motor voltage is kept constant.
- Current Control – In this mode the current to the motor is kept at maximum, increasing the voltage when required.
You can also specify the microstepping mode for both Voltage and Current control.
The Quick Start page also lets you set a wide variety of motor parameters. You can get details for each parameter (and every control on the web-based interface) by highlighting the “question mark” beside each control or parameter name. A dialog box will appear explaining the function of the selected item.
Finally, there is a “Quick Code” section that will allow you to create a Bash or Python script based upon the motor control settings you have selected.
As the Quick Start page is the heart of the web-based interface I will explain its functions in greater detail now.
Speed Control Mode
Let’s start in Speed Control mode.
In this mode you can regulate the speed of the stepper motor, using either Current or Voltage control.

There is an animated diagram of the motor shaft that accurately shows you the shaft position at all times. Below it are controls for Forward, Stop and Reverse.
Just beside the motor is a place where you can set the actual speed of the motor in RPM.
You may also select a microstepping value. If you are in Current control it will range from 1/1 to 1/16, in Voltage control you may select between 1/1 and 1/128 microsteps.
There is also a “Stop on Switch” checkbox. When it is enabled the motor will stop when the SW pin on the powerSTEP01 breakout connector is grounded. This would make an ideal limit switch configuration.
Servo Control Mode
Servo Control mode allows you to specify a position in degrees and have the motor shaft move to that position. In this respect, it is a bit like a servo motor.

You may specify the angle you want to position the shaft in two ways:
- By dragging a “handle” on the animated motor shaft diagram. The motor shaft will “follow” your movements.
- By entering an angular value into the Position text box beside the animated diagram. The motor will immediately move into that position.
As with Speed Control mode, you can select if you want to drive the motor using Current or Voltage control. You may also set the microstep values.
This mode would be very useful if you wanted to always return the motor shaft to a specific position.
External Step Clock Mode
In External Step Clock mode, you use an external clock signal to step the motor. You can still monitor the shaft position using the web-based interface.

You apply the clock pulse to the STEP pin on the powerSTEP01 breakout connector. The clock pulse needs to be a 3.3-volt logic level signal, which you can derive from a microcontroller, an external oscillator or timer chip.
You could use several WiFi Stepper boards in tandem and synchronize them to the same clock signal.
As with the previous modes you may select Voltage or Current control for your stepper and may also change the microstep value. The motor will move one microstep for every clock pulse it receives.
Increasing the clock frequency will, of course, increase the speed of the motor.
There is a Start and Stop control for the motor. As with the other modes, the animated diagram will display the current motor shaft position.
In External Step Clock mode, there is a checkbox labeled “Direction on SW”. When this is checked you can use the SW input on the powerSTEP01 breakout connector to change the motor direction.
When the SW pin is brought high (3.3-volts) or left unattached (it has an internal pull-up resistor holding it high) the motor will spin forward. When it is grounded (low) it will spin in reverse.
This would make an excellent limit switch for a device that needs to change direction when a mechanical or optical switch is triggered.
Here is the test setup I used when evaluating the WiFi Stepper controller in External Step Clock mode.

I used a signal generator set for a 3.3-volt square wave output in my testing. Using this I was able to drive the motor and change the speed by changing the pulse frequency.
Voltage vs Current Control
All the above modes are useable in both Voltage and Current control modes here are some of the differences between the two:
Voltage Control
In this mode, the voltage to the motor coils is kept to a constant voltage, the same voltage as the power supply for the WiFi Stepper.
Advantages
- The motor consumes less current than Current Control mode.
- The motor runs quieter
- The motor can be microstepped to 1/128 microsteps.
- The motor runs cooler
Disadvantages
- The motor has less torque.
- Need to solder over pads on the bottom of WiFi Stepper for optimum performance (although I used it without doing this and it worked just fine)
Current Control
In Current control, the maximum amount of current is delivered to the motor coils. The board uses a current pump to achieve this. As a result, the motor will often be driven at a higher coil voltage than it is rated. The powerSTEP01 motor controller manages the current to prevent damaging the coils. You can set the parameters for maximum current in the web-based interface.
Advantages
- The motor has much greater torque and holding power.
Disadvantages
- The motor runs hotter. You may need to add a heatsink to the motor frame.
- The motor is much louder.
- You are limited to 1/16 microstep.
- The motor draws a lot more current from the power supply.
You’ll need to determine which mode is better suited to your application.
Bash & Python Scripts
The web-based interface is not the only way to control the WiFi Stepper.
You can also use a Bash or Python script running on a wifi-equipped computer to control the device through its API. The WiFi Stepper will return status information in JSON format.
The prerelease version of the WiFi Stepper that I evaluated only had the Bash script functionality operating, so I was unable to test it with Python.
The easiest way of testing Bash scripts is to use either a Linux or Mac workstation, the Mac operating system OSX is actually just a shell running on UNIX so it has native Bash script support.
I use a Raspberry Pi 3B+ running Raspbian, which is based upon Debian Linux, to test the Bash script functionality.
Setting Up the Environment – JQ
Before you can run your Bash scripts you will need to install JQ.
JQ is a command-line JSON processor, allowing you to parse JSON text. It is required as the WiFi Stepper API returns data in JSON format. You can read the JQ documentation for more information if you’re interested.
On the Raspbian desktop you can install JQ from the command line. Open your Terminal and type the folowing text.
sudo apt-get install jq
This requires you to be connected to the internet, so do this before you connect to the WiFi Stepper if you are using a Raspberry Pi W or WH. On a Raspberry Pi 3B+ (or 3B) you can use an ethernet cable to connect to the internet while simultaneously connecting to the WiFi Stepper using the wifi interface.
The installation of JQ takes a while so you’ll need to be patient.
Once JQ is installed you are ready to get the text for your Bash script.
Getting the Script
The web-based interface can be used to generate text for the Bash script.
Connect your Raspberry Pi (or other Linux box or Mac) to the WiFi Stepper and navigate to the web-based interface using the web browser.
In my example, which you can observe in the video, I used the WiFi Stepper in Servo Mode. Any other mode will work as well.
I then used the web-based interface to move my motor to the 180-degree position.
After moving my motor I scrolled down in the web-based interface to the Quick Code section. There are two tabs, one for Bash and the other for Python.

I used the Copy button to copy the Bash code. I then pasted it into a text editor, on the Raspberry Pi I chose Geany.
The Quick Code is not the complete script, in fact, it’s more than that. It is a collection of sample snippets that you can use to create a script, based upon the settings you have selected in the web-based interface.
In Geany I edited the script to eliminate the Stop, Speed and External Clock sections. I left the Servo section intact.
I saved the script with a “.sh” extension, I called mine stepper180.sh.
Now back in the terminal I made my script executable, using the folowing command:
chmod -x stepper180.sh
Of course, you should replace the stepper180.sh with the name of your script!
Now the only step left is to run it
Running the Script
Running a Bash script at the command line is very easy. You just precede the script name with “./”.
So in my case I typed ./stepper180.sh

When I did this and hit Enter I observed my motor moving 180-degrees, just as the script directed it to do.
I also observed the motor status information returned to me in the terminal.
This was a very simple example but I’m sure it gives you an idea of the power behind this. You could write a script to make the motor go through a predetermined set of instructions. You could then run a program on the Raspberry Pi to call the script when a specific condition is met.
And of course you are not limited to one script, you could have several of them.
This would allow you to completely automate the operation of the WiFi Stepper.
Conclusion
The WiFi Stepper is a versatile stepper motor controller with a wealth of features. I can think of many uses for this board in robotics, home automation, and IoT projects.
I would like to thank Andrew Klofas ate Good Robotics for sending me the sample board. If you would like to get one yourself please visit his crowdfunding page on Crowd Supply where you will find information on supporting and purchasing the WiFi Stepper board.

Thanks for the insight, very good video
Can I run multiple stepper motors with one web interface program?
Hi dronbot, I enjoyed your video on the Wi-Fi stepper motor and was wondering if a 28BYJ-48 stepper motor can be used with the Wi-Fi. Control? Best Regards, Terry – Newcastle Ca
I want this desperately but nobody seems to be able to deliver.
Where can I buy?
great lesson you are very coming in your instruction method.